How to Clean a CPAP Mask Safely
Wash the mask parts with warm water and mild soap, rinse thoroughly, then let everything air-dry completely before you put the mask back together. Below: what you need, the steps, how often to clean, and what to avoid.
This page draws on researched, manufacturer-friendly guidance — if your mask manual names a different soap or product, follow the manual. When in doubt, stick with a gentle, unscented soap and warm water.
A safe CPAP mask cleaning routine you can actually keep up with
The safest short answer
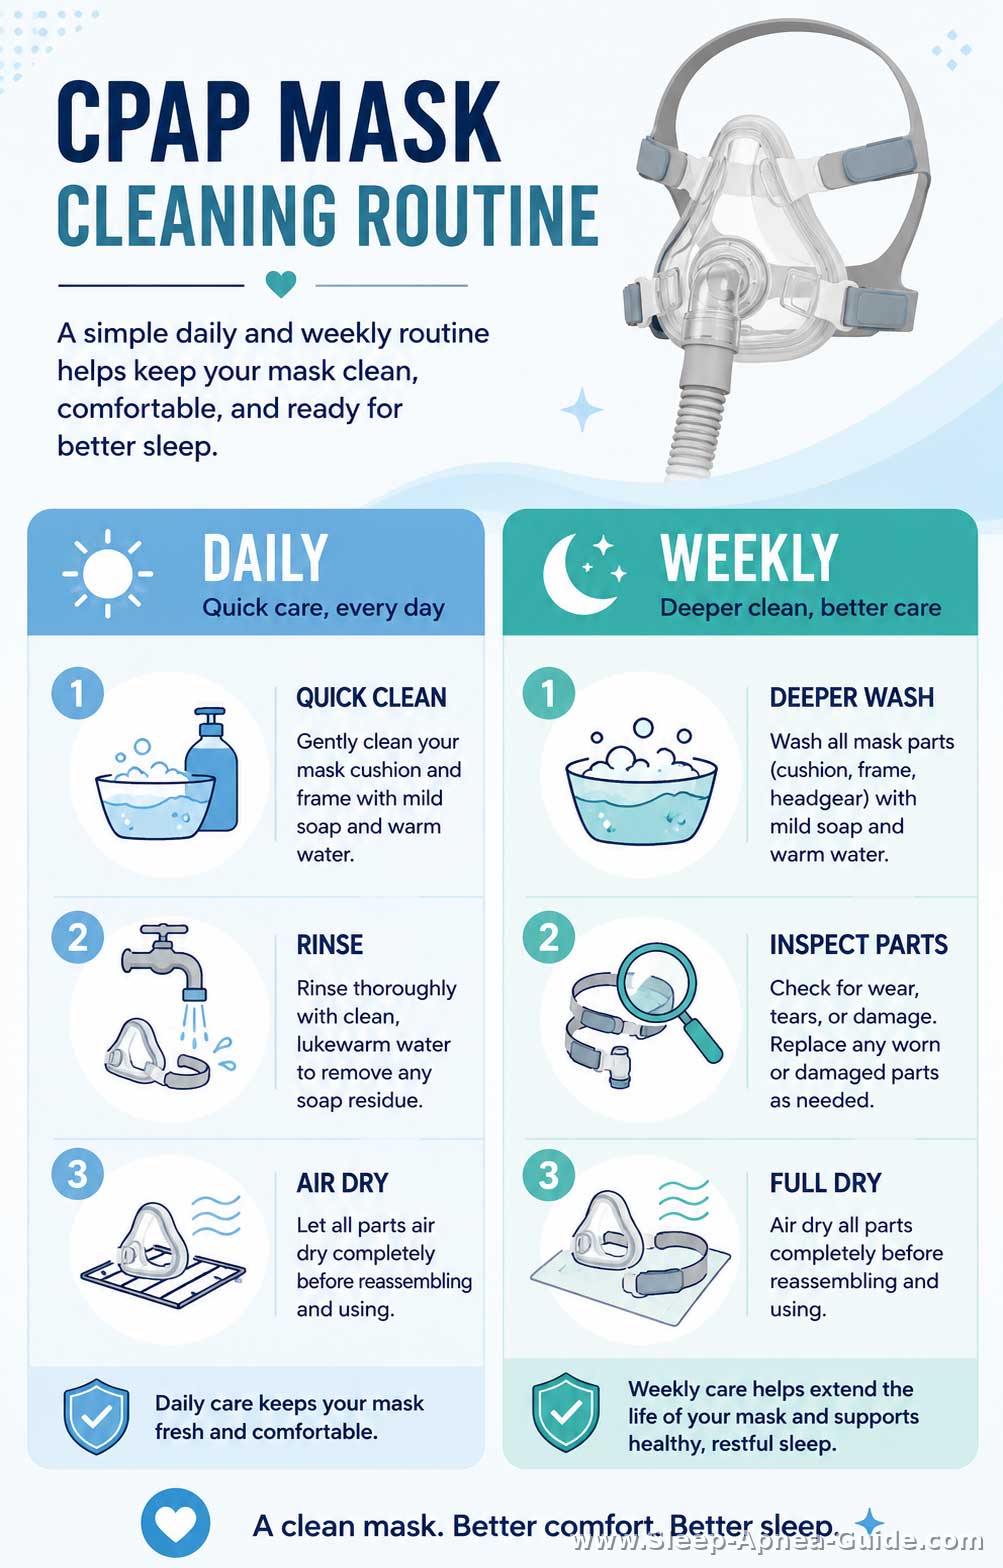
Cleaning your CPAP mask safely comes down to a small, repeatable baseline — not a project to get through. Warm water, mild soap, and full air-drying, applied to all your removable mask parts, can help the mask hold a steady seal against your skin, night after night.
- Baseline method: warm water, mild soap, a thorough rinse, full air-dry
- What it protects: the silicone and plastic parts that touch your face
- What it removes: the oils, sweat, and moisture that build up overnight — left alone, this buildup can leave a greasy film that makes leaks more likely, and can let germs collect on the mask surface fairly quickly
You don't need a perfect routine. A little, done consistently, beats a lot done occasionally.
Why this page focuses on the mask first
When you are dealing with treatment fatigue, the idea of cleaning an entire CPAP machine setup can feel incredibly overwhelming. It's easy to feel tired, frustrated, and worn down by the daily demands of sleep therapy. You do not need to solve all your CPAP maintenance at once.
By focusing just on the mask first, you can tackle the single piece of equipment that actually touches your face every night. Mastering a simple CPAP mask cleaning routine gives you a practical, low-pressure win. Once this small habit feels manageable, the rest of the equipment will feel much easier to handle.
What you need before you start
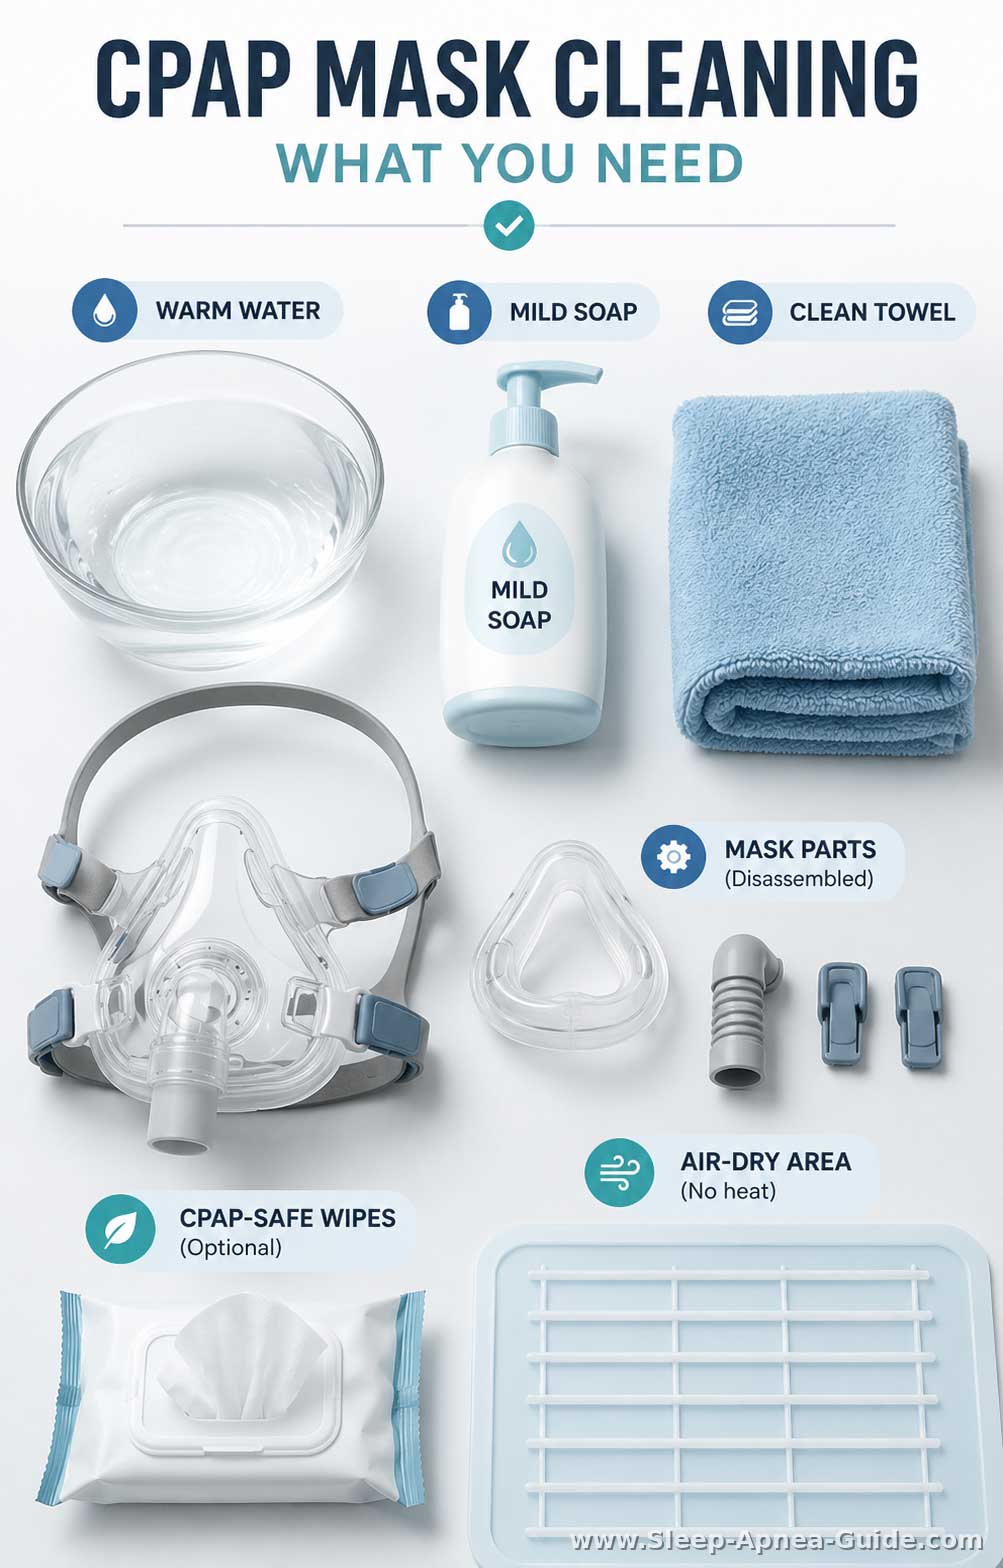
Keep your supplies simple and accessible. Mild, gentle cleaning products are commonly recommended across the board, though specific product approval can vary by mask model. Check your mask instructions if they differ from this basic list. It also helps to wash your face before putting the mask on each night, since a cleaner face means less oil transferring onto the cushion in the first place.
Mild soap
Choose a gentle, unscented soap, free of heavy moisturizers, strong fragrances, or antibacterial agents — these can leave residue or wear down the cushion faster.
Warm water
Use clean, warm water — not water that's uncomfortably hot to the touch. High heat can warp or damage the mask's flexible parts and may affect the seal.
Clean towel and drying area
Use a clean, lint-free towel and a flat spot to air-dry, kept away from direct sunlight — sunlight can yellow or crack silicone over time.
When CPAP-safe wipes may help
CPAP-specific, unscented wipes are handy for a quick daily wipe-down. They don't replace a full soapy wash, but they're a solid option on busy mornings.
- Mild, unscented liquid soap
- Warm (not hot) water
- Clean, lint-free towel
- Flat drying area out of direct sunlight
- Optional: CPAP-safe wipes for quick days
How to clean a CPAP mask step by step
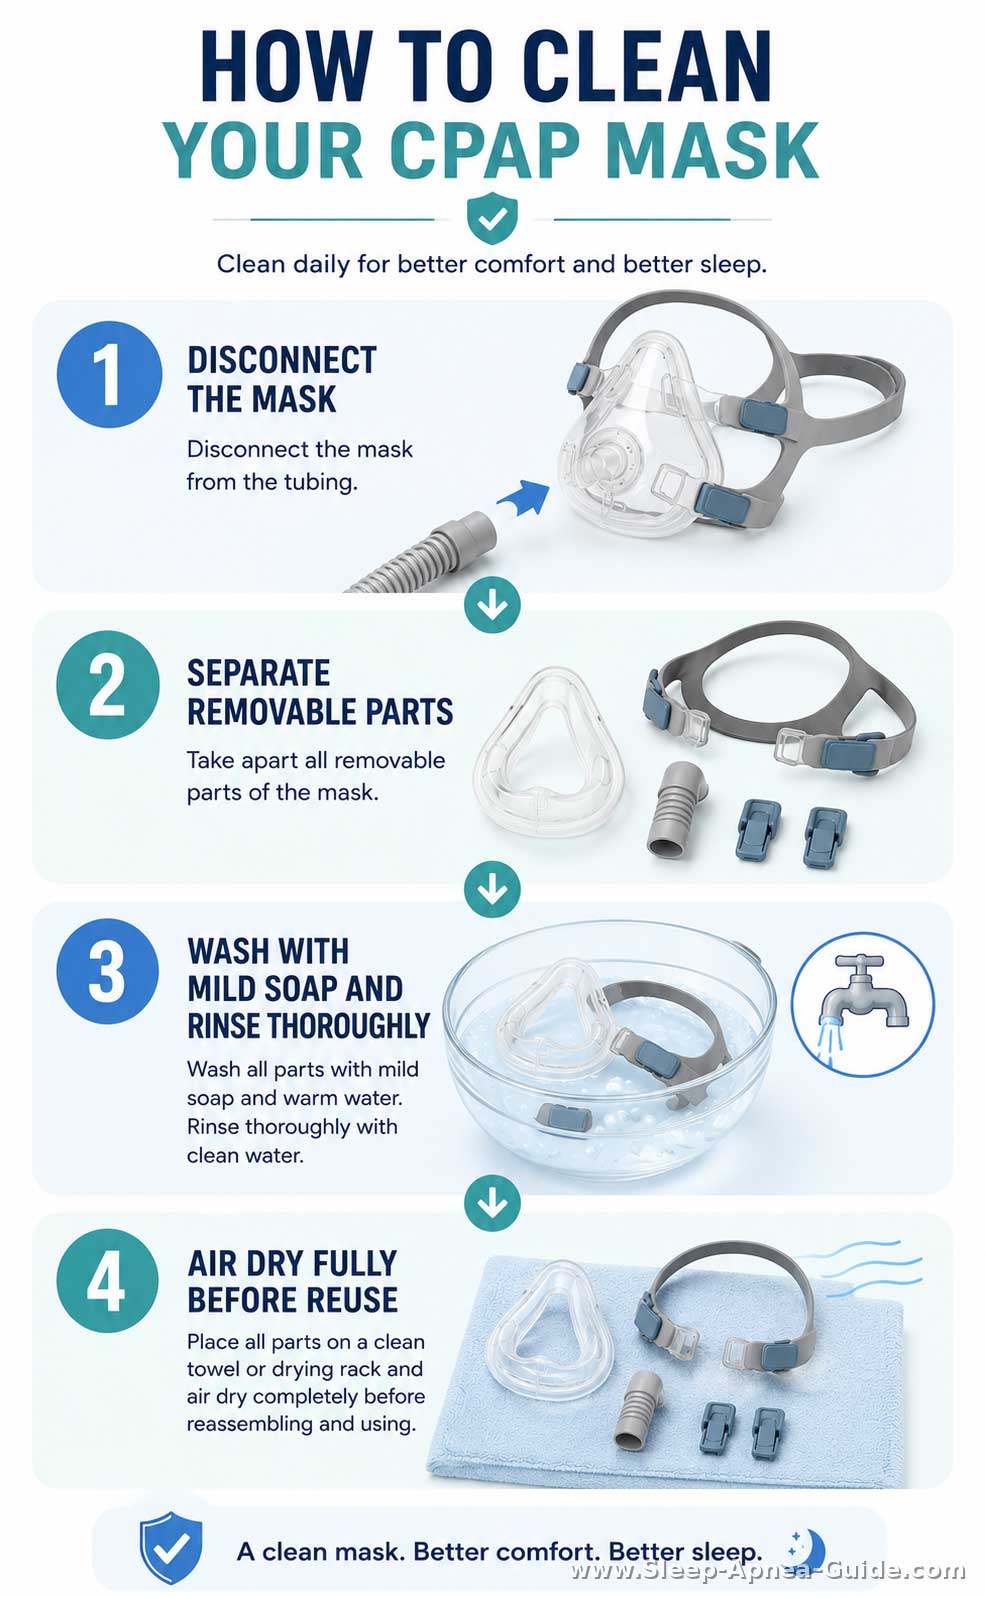
This routine reflects conservative, commonly recommended mask-care guidance.
Learning how to clean a CPAP mask safely comes down to a few basic, repeatable steps. Care details can differ across full-face, nasal, and nasal pillow masks, so check your manual for anything specific to your equipment.
1. Disconnect the mask and separate removable parts
Gently detach the mask from your CPAP tubing. Depending on your specific model, you may need to separate the silicone cushion, the hard plastic frame, and the fabric headgear. Taking the mask apart ensures that soap and water can actually reach all the small crevices where facial oils and moisture tend to collect.
2. Wash with warm water and a gentle cleaner
Fill a clean basin or your bathroom sink with warm water and add a few drops of your mild soap. Submerge the hard plastic and silicone mask parts. The fabric headgear usually requires less frequent, separate washing. Gently rub the silicone cushion and frame with your fingers to lift away any oils and dirt.
3. Rinse thoroughly
Drain the soapy water and rinse each mask part under warm, running water, until all soap bubbles and slippery residue are gone. Leftover soap can irritate your skin overnight and may affect the mask's seal.
4. Let everything air-dry fully before reuse
"Fully dry" means no visible water droplets or damp spots anywhere on the mask. Check inside the frame, along any seams, and in tucked-away spots like elbows and connectors — those tend to hold water the longest.
After rinsing, shake off the excess water and lay the parts on a clean towel on your bathroom counter, somewhere with a little airflow. Give them time to dry completely before putting the mask back together — reassembling too soon can leave trapped moisture that leads to a musty smell or a less comfortable fit.
How often to clean it: daily quick-clean, weekly deeper-clean
Knowing how often to clean a CPAP mask is just as important as knowing how to wash it. Building a sustainable CPAP mask cleaning routine is about balancing safe hygiene with your actual energy levels.
What to do after regular use
For daily care, the goal is simply to remove the facial oils and sweat from the cushion that touches your skin. A quick wipe-down with a clean, damp cloth or a CPAP-safe wipe is often enough to maintain a good seal and keep the mask fresh for the following night. If you're sick with a cold or the flu, it can help to wash the mask daily during that time, since more residue tends to build up.
What to do weekly
Once a week, aim for the full step-by-step wash described in the section above. This is the time to fully disassemble the mask, wash the frame and cushion in warm, soapy water, and gently hand-wash the fabric headgear if it has absorbed sweat or lost its elasticity.
How to keep the routine realistic on low-energy days
Some days, the full routine just isn't happening — and that's okay. What matters most is a minimum-effective version you can do in about two minutes.
Minimum-effective version:
- Wipe the cushion (the part touching your skin) with a CPAP-safe wipe. No wipes on hand? Wipe it with a clean, damp cloth and a drop of mild soap, then rinse.
- If the frame or elbow looks oily, wipe those too
- Skip alcohol-based wipes or hand sanitizer — they're too harsh for the mask material
- Let everything sit until it's dry to the touch, with no damp spots, before you reassemble
This isn't a shortcut you should feel bad about. On a low-energy day, this small version is enough to keep going — save the full wash for when you have more to give.
What not to use — and what can damage the mask
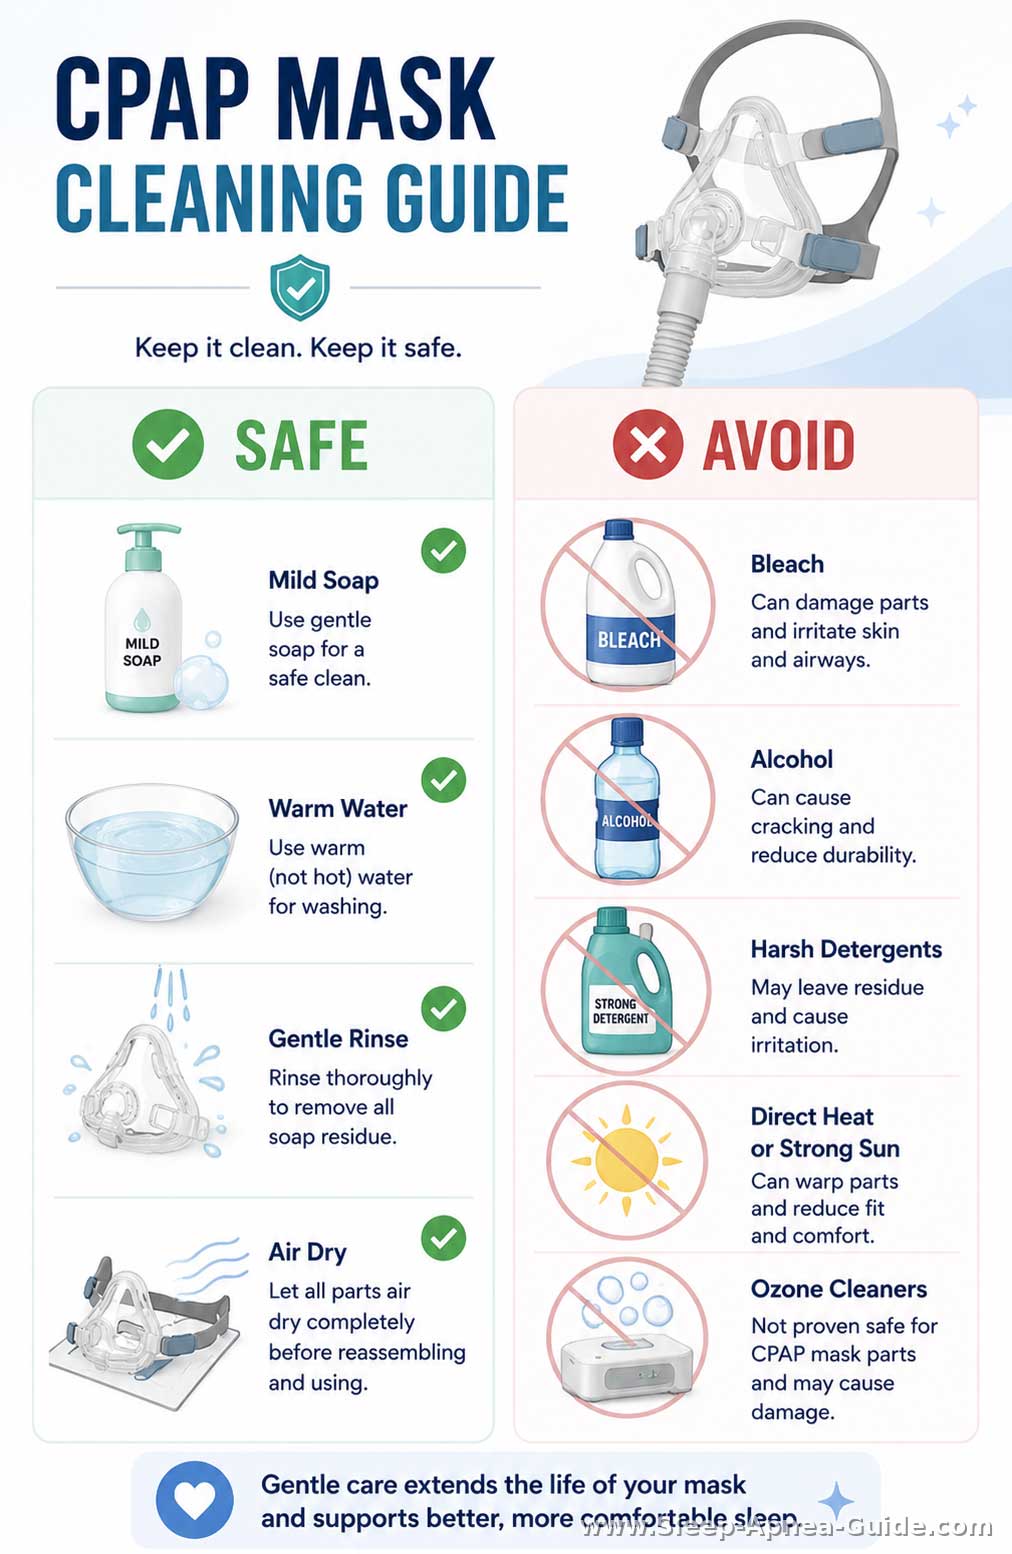
Note: Please verify with your mask manual before trying any new cleaning methods, as manufacturer instructions take priority.
Harsh products and unsupported cleaning methods
Protecting your mask means knowing exactly what to avoid. Harsh chemicals, rubbing alcohol, bleach, and strong household detergents can quickly break down silicone. This leads to skin irritation, a leaking mask, and the need for early replacement. Stick to manufacturer-friendly options to protect your health and your equipment.
Can you use vinegar, wipes, dish soap, baby shampoo, or ozone cleaners?
When looking for cleaning alternatives, you'll likely find a lot of conflicting advice online. Here's a conservative look at common household items — what's commonly suggested, and what to check before you try it.
Vinegar:
- Commonly recommended? Sometimes
- Why people consider it: Some suggest a diluted soak for hard plastic parts only
- Main risk: Can be too acidic for silicone and may leave a lingering smell
- What to verify: Whether a diluted vinegar soak is approved, and for which parts — plastic frame, not cushion or headgear
CPAP wipes:
- Commonly recommended? Yes
- Why people consider it: Made for quick daily wipe-downs of the cushion
- Main risk: Worth a quick label-check — not every wipe is alcohol-free
- What to verify: That wipes are CPAP-specific, unscented, and alcohol-free
Dish soap:
- Commonly recommended? Yes
- Why people consider it: Mild, unscented dish soap is often suggested for cutting through facial oils
- Main risk: Degreasers or added fragrance can leave residue or irritate skin
- What to verify: That mild dish detergent is allowed, and yours has no degreaser or strong scent
Baby shampoo:
- Commonly recommended? Yes
- Why people consider it: Generally gentle and free of harsh, stripping chemicals
- Main risk: Added moisturizers can leave a slick residue on the cushion
- What to verify: That your bottle has no added heavy moisturizers
Ozone cleaners (and some UV devices):
- Commonly recommended? No
- Why people consider it: Marketed as a no-scrub way to sanitize equipment
- Main risk: Several manufacturers warn these can degrade mask materials and void the warranty. The FDA has also stated that ozone and ultraviolet devices are not authorized for cleaning CPAP equipment. [1]
- What to verify: Your manufacturer's specific warnings on ozone or UV devices
Common mistakes that shorten mask life
A few practical slip-ups can shorten how long your mask parts — cushion, frame, and headgear — hold up:
- Drying on a sunny windowsill. Direct sunlight can degrade silicone over time, which may cause yellowing or cracking. Dry in shade instead.
- Using boiling water to sanitize. High heat can warp or damage plastic and silicone. Stick to warm water only.
- Wiping with alcohol-based wipes or hand sanitizer. These can dry out silicone, which may lead to it breaking down sooner. Use a CPAP-safe wipe, or mild soap and a rinse.
- Drying near a heat source — a dishwasher, hair dryer, or heating vent. Concentrated heat can warp plastic parts and shorten their life. Let parts air-dry at room temperature instead.
When cleaning is not enough
Sometimes, a mask will not perform well even after a thorough, careful cleaning. It is important to recognize the difference between a dirty mask and a worn-out one.
Signs a mask part may need replacement
Here's a simple rule: if a problem is still there after a full weekly wash — disassembled, washed, rinsed, and fully air-dried — it's likely wear, not dirt.
Rule out the usual false alarms first: leftover soap residue, or lingering mustiness from parts that weren't fully dry.
Signs worth paying attention to:
- Odor that's still there after a full wash and complete air-dry
- Needing to tighten the straps more than you used to, to get a good seal
- A cushion that feels stiffer or less springy than it used to
- Visible cracking or discoloration, especially along the cushion edge or anywhere the silicone bends
- Headgear that's stretched out and won't hold its shape
If you're seeing these signs, more cleaning won't fix it. Check your manual's replacement schedule, or reach out to your provider or DME if you're unsure.
When the manual should override general advice
General advice is helpful for building a practical routine, but your mask's manual is always the final authority. If your manufacturer specifies a different replacement schedule, suggests a specific cleaning frequency, or warns against a certain type of soap, that guidance must override anything you read online.
Ready for more? Clean the rest of your equipment
Once you are comfortable with your mask routine, you may feel ready to tackle the rest of your equipment at your own pace.
- To learn about caring for your tubing, see the guide on How to Clean a CPAP Hose.
- For managing your water chamber, read How to Clean a CPAP Humidifier.
- When you are ready for the big picture, explore the complete CPAP Care and Maintenance Guide.
Take your routine one step at a time, and prioritize the safe, simple habits that work best for you.
Sources:
- [1] FDA (n.d.). Safety Communication on CPAP Cleaners. https://www.fda.gov/medical-devices/safety-communications/cpap-cleaners-and-other-cpap-accessories-fda-safety-communication
Affiliate Disclosure
As an Amazon Associate I earn from qualifying purchases.
Recent Articles


-
The Best CPAP Pillow For Sleep Apnea
Jul 22, 18 01:15 PM
 Why do you need a CPAP pillow, Which pillow is the best for CPAP users, and how to make one if you can't afford It.
 -
How To Use Portable Pulse Oximeter To Track Sleep Apnea Treatment?
Jul 09, 18 02:51 PM
 How can a portable pulse oximeter help with CPAP treatment? Can you trust a pulse oximeter to monitor sleep apnea? Click here to find the answers.
 -
The 3 Best Ways To Stop CPAP Dry Mouth
Jun 23, 18 11:02 AM
 How can you prevent and treat CPAP dry mouth? A practical guide to assist you with dry mouth when using the CPAP machine.
Subscribe
Don't worry - your e-mail address is totally secured. I promise to use it only to send you monthly updates with useful tips to improve you sleep apnea.


